Adding Value with Sublimation Mugs: Sublimating Full-Bleed mugs and handle

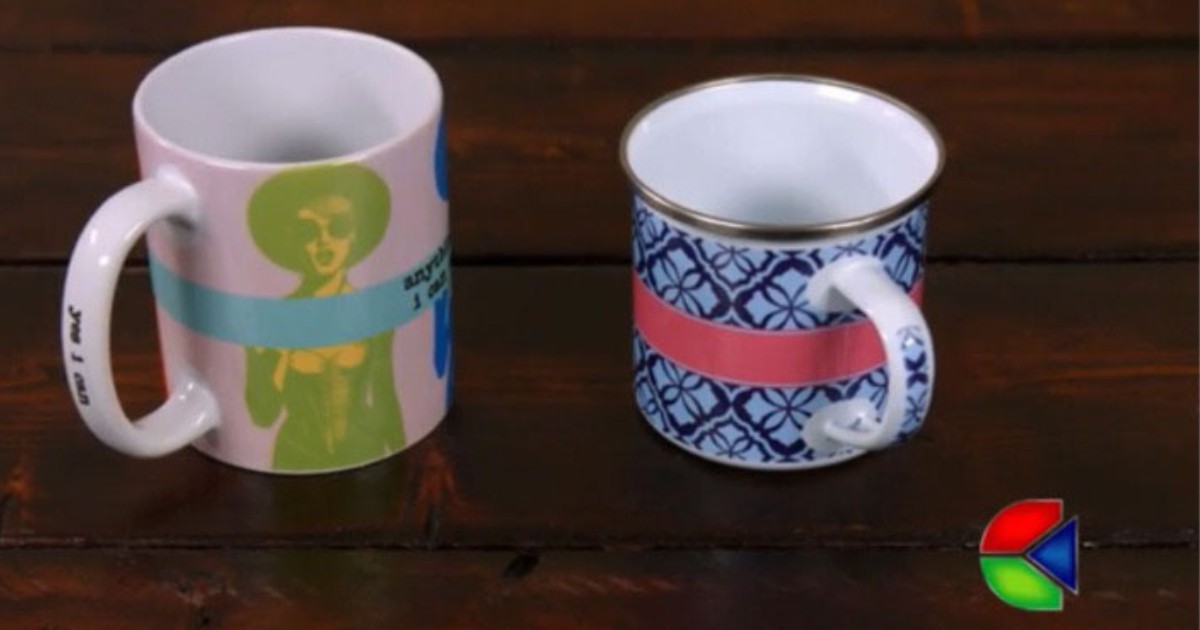
If we take a quick tour down Google, we see many individuals and businesses offering sublimated and decorated mugs. The standard sublimated mug you see that the finished product usually has a image and/or logo pressed in one or two spots, leaving much of the surrounding area still blanks. These mugs are great but there’s potential for more. (Insert image)
The questions you should ask yourselves when you see these mugs: How can you make it better? How can you make a mug that stands out? How can you make a mug that is unique in a world saturated by a gazillion others? The bottom line: How can you stand out from the crowd with a product that is already been sold 100 different ways? different from the mainstream?
Add Value!

Sublimating a mug handle is pretty straight forward and most sublimators have all the supplies and equipment needed. Using full-bleed designs in addition to a handle design will compliment the mug and truly allow it to shine! (insert image: full-bleed mug with imprinted handle)
Utilizing this technique to image a majority of the mug increases value of the product but adds an element of perceived value that others simply aren’t doing. It allows for further personalization and customization to truly make the mug one of a kind.
Supplies Needed & Instructions
-Equipment and Supplies needed:
- Sublimation Printer
- Convection Oven
- Printed Full-Bleed and Handle Transfer & scissors
- Ceramic Mug
- SubliShrink Wrap Film
- Sublimation Heat Tape
- Heat Gun
- Heat Gloves
Instructions

Step 1:
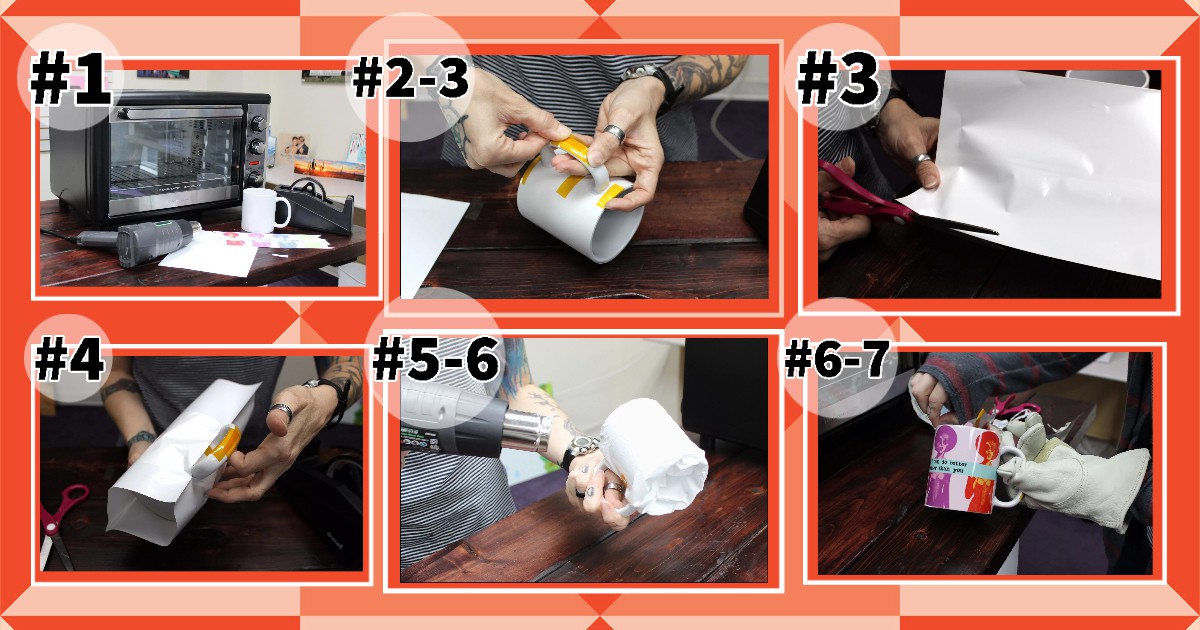
Preheat oven to 400 degrees.
Step 2:
Cut out template and tape it tightly to your mug.
Optional: If adding a handle design, make sure it is taped down securely.
Step 3:
Cut a slit about 2? from the bottom of the shrink wrap and slip the wrap over the mug with the handle out.
Step 4:
Tape shrink wrap under handle to ensure that it will not separate when tightened with heat.
Step 5:
Tuck excess SubliShink into the mug and evenly tighten the wrap by using the heat gun to apply hot air.
Step 6:
Place in preheated oven for 13 minutes.
Step 7:
Use caution to remove SubliShrink and paper from hot mug immediately. Now, the mug is complete.
